
Are you curious about what can you do with Cricut Maker 3? Start your creative journey with this crafting machine. With its adaptive tool system, this versatile machine can work with intricate designs and cut more than 100 materials. As one of the most advanced devices in its class, it makes crafting easy by embossing, cutting, drawing, and engraving materials like paper, fabric, leather, and balsa wood. Cricut Maker 3 is perfect for crafters looking to improve their DIY projects to a pro-level with precision.
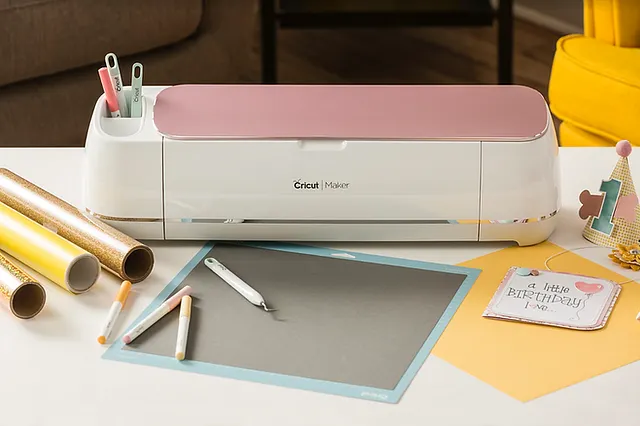
So, are you excited to explore Cricut Maker 3? If yes, then this blog will walk you through it and share tips for beginners and experienced users. Read to discover its endless possibilities.
3 Cricut Project Ideas for Beginners
With this versatile cutting machine, you can create various projects. So, grab your crafting tool and get started exploring some projects that you can make with it.
Mugs
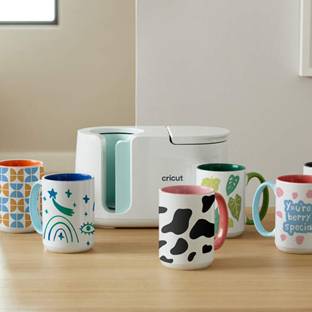
Vinyl-based projects are easy to make and look beautiful when they are done. This project involves using permanent vinyl. First, make your design in the Design Space app, then cut it with the machine, and when it is done, transfer it onto your mug. But to transfer your design, you will also need a Mug Press machine. This Maker 3 machine is for cutting the design rather than for applying the design. This vinyl material can be used for smooth surfaces like glass, metal, jars, and wood.
Stickers
Colorful stickers always look amazing on a diary or journal. Now, you can make custom stickers with the Print Then Cut feature. Just create your design for stickers, print the image onto materials like sticker paper or adhesive sheets, load the mat for cutting. Once done, unload the material, and your sticker is ready.
Shirts
You can create custom shirts in just a few steps. With Infusible Ink, transferring designs is easy and gives you vibrant, permanent colors infused directly onto your shirt. First, you must create a design on the Design Space app and then send it to the machine for cutting. Remember to put the shiny side down on your cutting mat. Now, unload the mat, remove the extra part, and apply the design to your shirt with the help of EasyPress 2.
Above, you read what can you do with Cricut Maker 3 and now you will read how to use it for creating your projects.
How to Use Cricut Maker 3? (Easy Steps)
Now that you know the types of projects possible, here is the full process of how to create such a project with this crafting tool:
Step 1: Select the Correct Tools
Choosing the right tools is crucial for making a project with the machine. Each tool has a different feature, so use various blades accordingly. A rotary blade can cut a variety of materials, such as fabric, leather, wool, etc. A knife blade can be used for thick materials like wood, foam, and leather. Similarly, the selection of mats is also important.
Step 2: Set up the Material
To cut the material with your machine, you first have to load your material and insert the mat into the machine. Smart materials remove the need for mats. You can directly insert the material into your machine. It comes in various material types, including smart vinyl and smart iron-on, and offers up to 2x cutting speeds compared to other materials. The machine automatically checks which tools should be used and places them.
Step 3: Remove Excess Material
Though the Cricut Maker 3 cuts materials, it does not remove excess material on its own. Manually removing the excess part is important, and using the Cricut BrightPad can make this easier by enhancing cut visibility.
Step 4: Finish Your Project
After cutting and weeding your design, you can use the cutting material for various projects. Cricut can cut HTV into shapes, which you can apply to your cloth and press the design with your EasyPress 2 machine.
Conclusion
In this blog, I have provided a full guide on what can you do with Cricut Maker 3, how to use it and the projects you can create. This crafting machine is capable of cutting various materials and supports different blades and tools, ensuring accurate cutting, scoring, and engraving.
Whether your goal is to design personalized t-shirts, vinyl mugs, or decals, the Cricut Maker 3 can help you achieve your creative vision. Get inspired and begin to discover your crafting potential.
Frequently Asked Questions (FAQs)
What materials can you cut with Cricut Maker 3?
This machine can cut various materials, such as paper, fabric, vinyl, cardstock, leather, wood, and many more. Depending on the blade used and the material’s thickness, it can cut more than 300+ materials; it is one of the most versatile crafting machines available in the market.
What projects can you make with Cricut Maker 3?
Here are a few projects you can easily make using this cutting machine.
- Mugs
- Gift tags
- Stickers
- Shirts
- Greeting cards
- Bookmarks
- Tumblers
- Cake toppers, etc.
How to Connect Cricut Maker 3 without an Internet Connection?
Yes, you can easily add a machine to your device and use it without the internet, as long as you have installed and saved design projects to your operating system with the help of Cricut Design Space while you are online. Now, you can edit and cut those designs using the offline feature in the application.